enacteservices@gmail.com
 +91 79861 55734
Setting up a Shopify store is a step task if you’re ready with your unique and creative idea. Actually, the process starts with an idea, and if you have your idea in your hand, you’re so close to building your online store on Shopify. In this article, we will tell you the few steps to setting up your own Shopify store.
But, if you don’t know your business’s unique value proposition or are not ready with your business idea, Shopify can help you at every stage, from start to finish. Perhaps you want to browse the list of Shopify app business ideas?
Ideation and inspiration are the very first steps to take if you are creating your own Shopify store. With a unique idea, you can’t grow your online store. The market is full of competition, so it’s important that you’re completely ready with your idea that is unique so that you can set up your idea and also grow in the market.
Make sure that idea testing is really needed in order to know the success rate of your idea.
Once you’re ready with your idea, it’s time to create your Shopify account. Shopify creates your account in less than a minute.
Go to Shopify.com and sign up using your credentials (username and password).
You will be asked to enter your store name. It should be unique because it will be present in your Shopify stores.
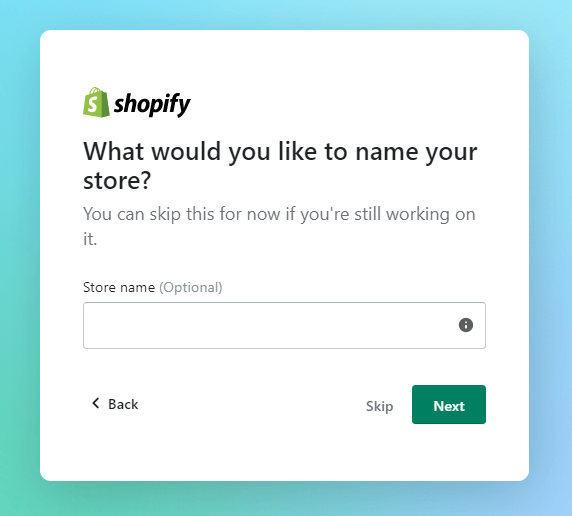
To get the domain from your store name, you need to choose a unique store name.
Once you’re done, go ahead. Shopify will ask you how much you plan to sell and if you’re already selling. Write the answer accordingly. Tap on the Enter My Store button when complete.
Ahead of the process, you will be asked to provide personal information such as your name, address, email, phone number, etc.
Complete all the steps by filling in your details as asked by Shopify, and your online store will get ready. Once you’re done, the store dashboard shows you tips for the next step.
Note:
Shopify offers 14 day trial period, so now you have 14 days to launch your store, and when the trial ends, you should pick a paid Shopify plan. Check here for Shopify pricing details for the online store.
From the Shopify dashboard, the second step is to add your first product. Follow the below steps to add your first products to Shopify.
From the admin page, click the Product section, and it will take you to the Product page, where you can add your products.
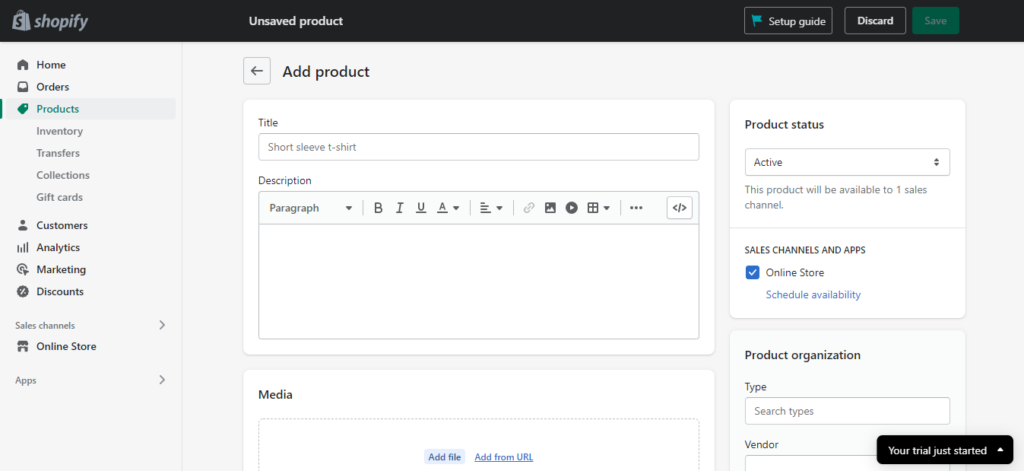
On the Product page, click Add Product, and Start adding your product.
Adding products is a crucial task because how you tell about your products to the audience will lead the sales, so it should be short, but answer all their question. There are various things you should do while adding products, such as the title of your product along with product-specific details. Describe your product in a way that answers all the questions about it.
Images of your product leave a great impact on customers. They should be of high resolution. Add more details like shipping details, weight, price, and more.
Once you’re done with all the details of the product, hit the Save button.
Shopify theme selection is an important job for you because it enhances the look of your store. Shopify itself provides thousands of themes. There are free and paid themes available. You can choose from there.
Shopify itself automatically adds a default theme to your store, and it already looks great. However, you can change it if you want to customize it more. A customized site can also help enhance your brand, but it’s not necessary for the primary stage of your business.
If you really want to customize your online store theme, then we suggest you go for a free theme. At the beginning of your startup, it’s not important to spend on things. You can enhance your audience’s experience with free themes, engaging banners, and a creative logo.
You can access the free Shopify themes from within the admin. Or you can visit the Shopify Theme Store and browse various themes and add them to your store.
If you still want to customize your online store with a Shopify paid theme, you can visit Shopify Paid Theme. A Shopify paid theme is not refundable, so make sure you preview or try the paid theme before you purchase them. You can try a paid theme to see how it looks with your products, categories, brand colors, and style.
You can edit, rearrange, and do a lot of other customizations in the Shopify theme to give a fantastic look to your online store.
If you have a good budget, then only you should go for a paid theme. With a good budget, you may also hire a Shopify expert agency to build a unique theme for your business.
Once your theme gets updated on your online store, there are various important things you should consider to start selling and earning profits on Shopify.
Adding shipping details to your Shopify store is the next step in the process. Give your customer every piece of information that they need before making a purchase, such as shipping cost, shipping destination, product weight and size, product packaging, carrier rates, free shipping, etc.
Like every business, you are expected to pay taxes to the government as a proportion of your revenue. You will also be expected to collect some form of VAT on most products too. To check your tax options, go to Settings>Taxes. Here you can also check if your price already takes taxes into account or whether tax is liable in the customer’s country of residence, and whether VAT should be charged on digital goods, etc.
Tax is an essential thing, and therefore, we recommend you consult a tax professional if you have any questions about taxes. Shopify does not file or remit sales taxes for you.
Setting up a payment method will allow you to receive revenue from online purchases. There are various third-party payment gateways available that you can integrate into your Shopify stores, such as PayPal, RazorPay, Stripe, Amazon Pay, and more.
You can also use Shopify Payments as well. But, for this, you have to be lucky enough to be in one of the Supported countries for Shopify Payments.
You’re ready to launch your Shopify store, but one important part of your brand is missing- a custom domain. You have to purchase the customised domain for your Shopify online store. You can buy a domain from Shopify or another registered domain portal. Once you get your domain, go to Online Store>Domain and update your DNS record.
Your Shopify Online Store is ready to launch. Simply remove the password page on Online Store > Preferences and let the world know you’re open for business.
That’s how you set up your Shopify store. I hope you find this Shopify setup tutorial helpful. However, if you are finding it difficult to decide on everything on your own and if you have a good budget, you can go with the Shopify web development company. They can help you set up your Shopify store and tell you what more you can do with your online store. There are various Shopify development companies, but we recommend you go with enAct eServices– best Shopify App development company. However, the choice is yours!